
A video editor can feel confusing when you don’t know where its main tools are. In this guide I will tell you how to edit videos in CapCut that takes you through a clear workflow: import footage, make clean cuts, add captions, balance audio, and export your finished video.
You will also learn a few ways to keep playback smooth and give your edit a more polished feel.
Get Started in CapCut and Learn the Workspace
Find the main editing tools
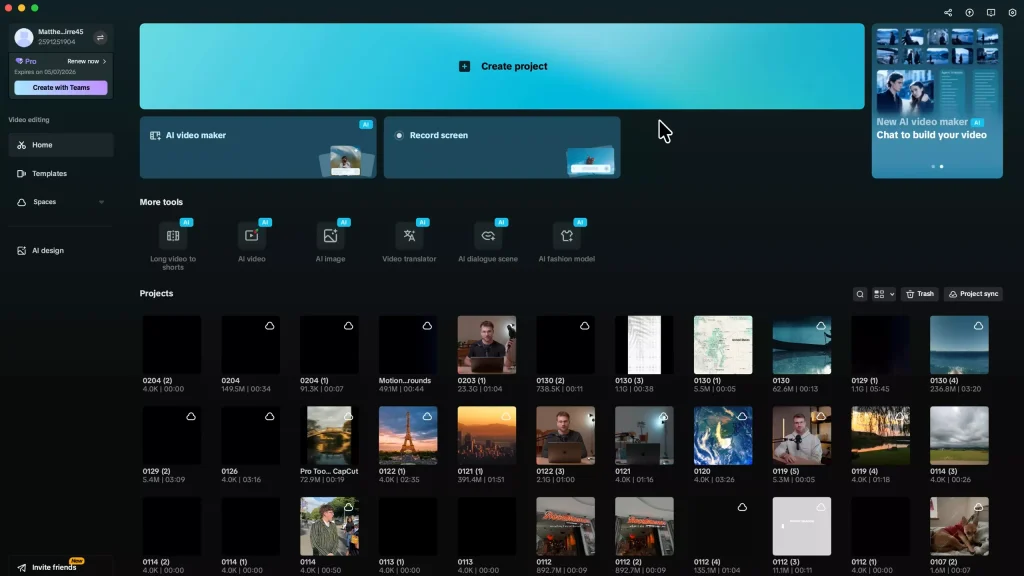
When you create a new project, CapCut opens its editing workspace. The media panel holds your footage, photos, music, and other assets.
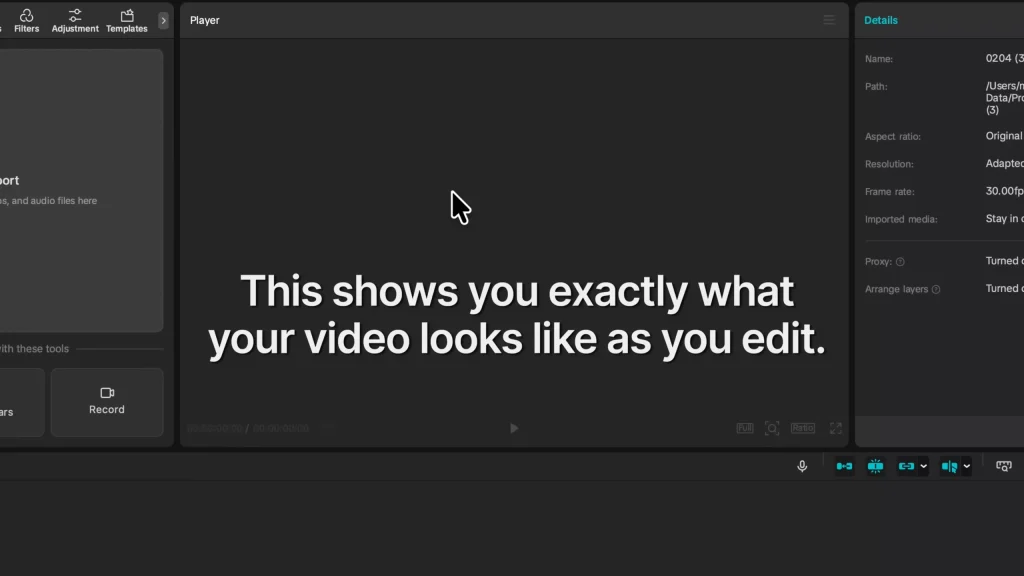
The preview player shows the frame at the playhead, while the inspector panel contains project settings and clip controls such as scale, position, and speed.
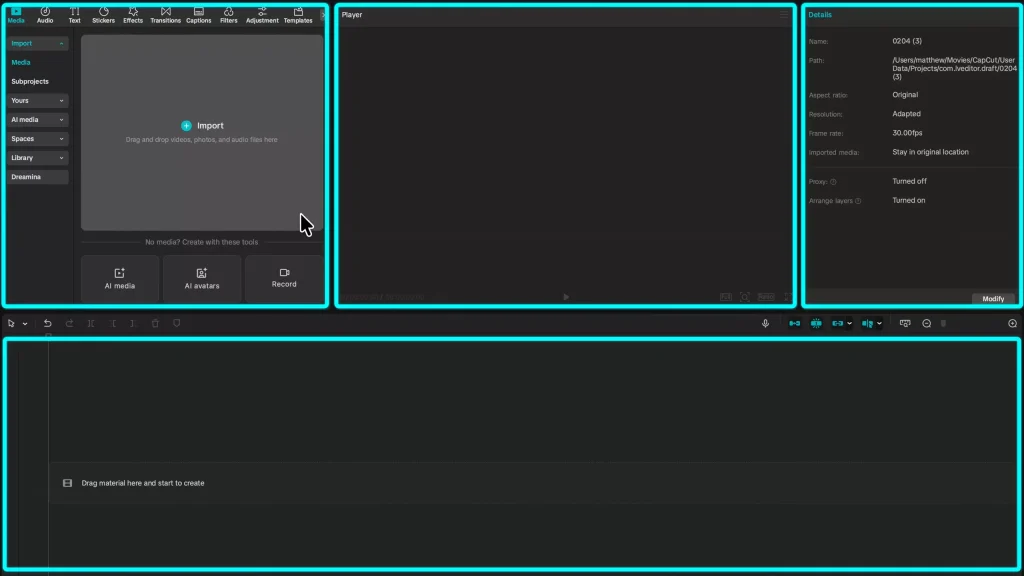
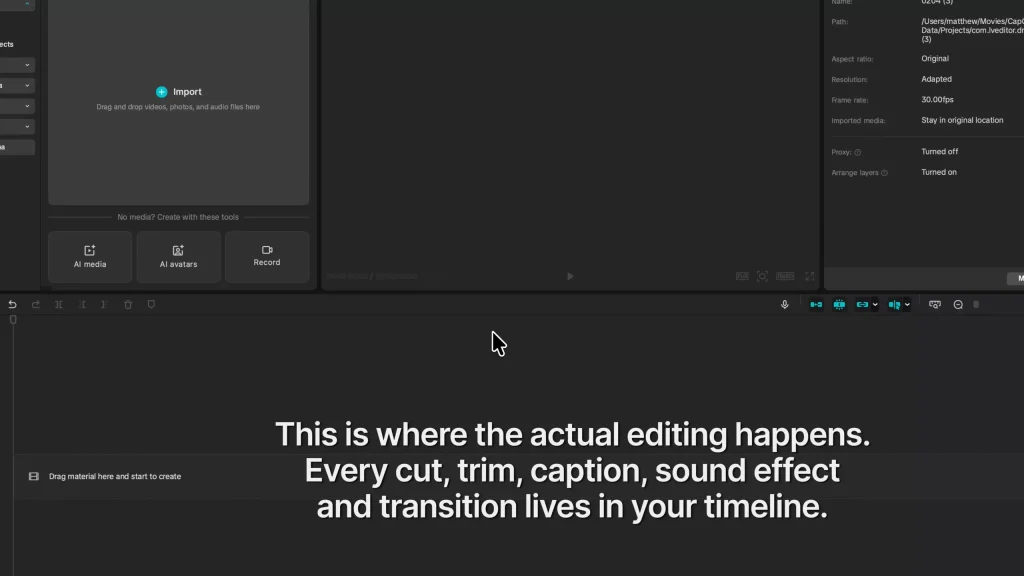
The timeline sits at the bottom of the screen. That’s where you arrange clips and make edits.
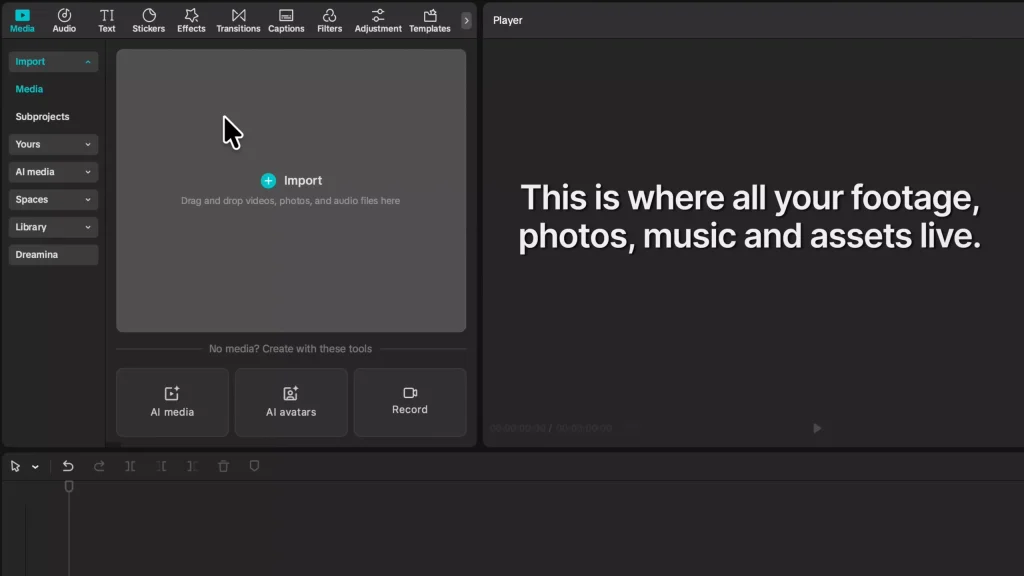
Once you know these four areas, the interface is easier to use.
Import footage and add clips
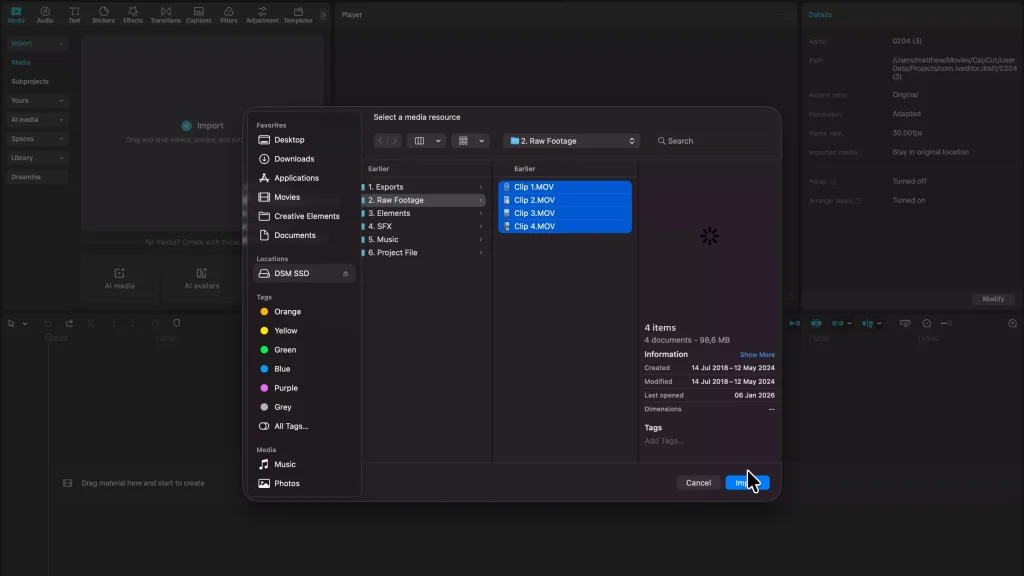
Click Import in the media panel and choose the video clips you want to edit.
To add a clip to the timeline, click its blue add button or drag it into place.
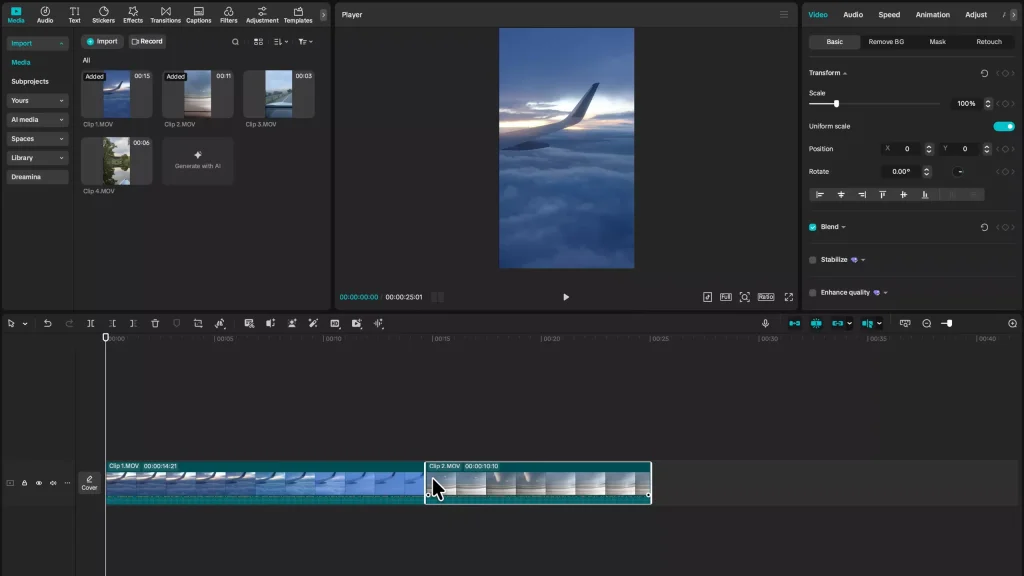
Once a clip is on the timeline, you can start cutting and arranging your video.
Control the timeline and playhead
The playhead is the white line on the timeline. It shows which frame appears in the preview, and you can drag it to scrub through your footage.
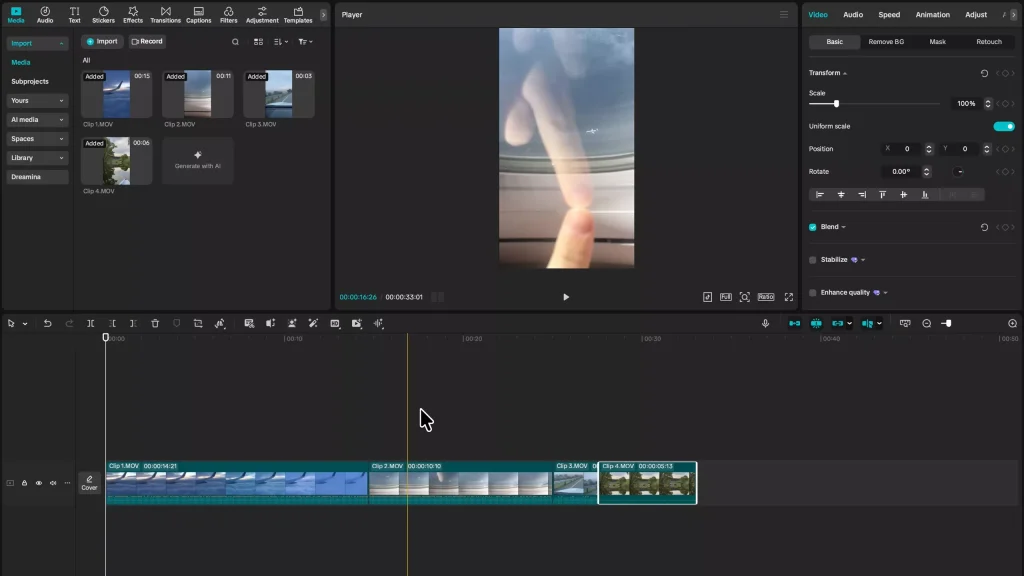
Zoom in or out with Command or Control and your mouse wheel, use the timeline’s zoom controls, or press the plus and minus keys.
CapCut automatically saves your project, so you can close it and return to your edit later.
Shape Your CapCut Edit With Cuts and Transitions
Remove unwanted footage
For a split, move the playhead to the cut point and press Command-B. Select the section you don’t want and delete it. You can also shorten or extend a clip by dragging its start or end edge on the timeline.
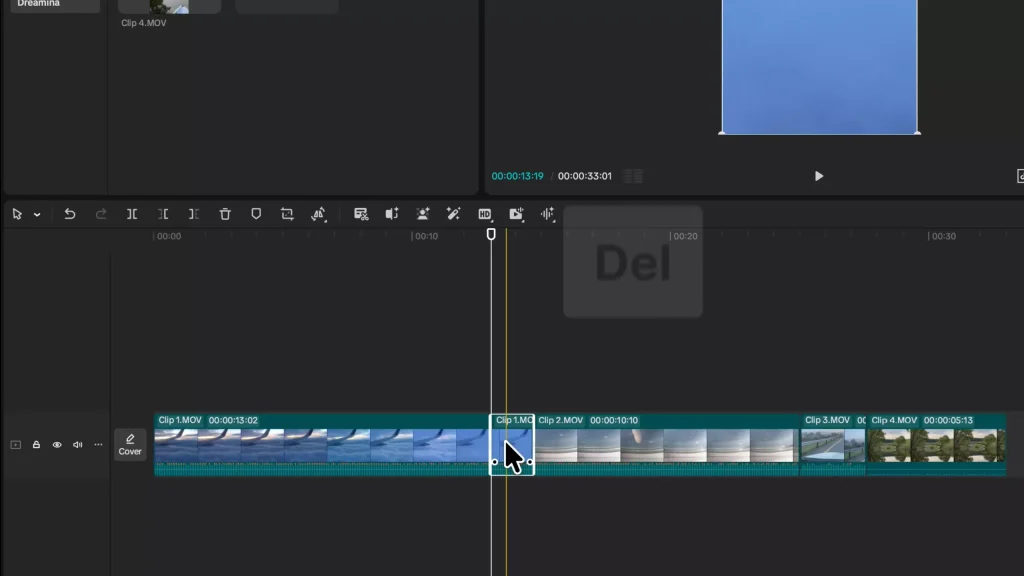
For a faster trim, place the playhead where you want to keep footage and press Q to remove everything to its left. Press W to remove everything to its right. These steps alone can cover you 99% of real editing.
Add transitions between clips
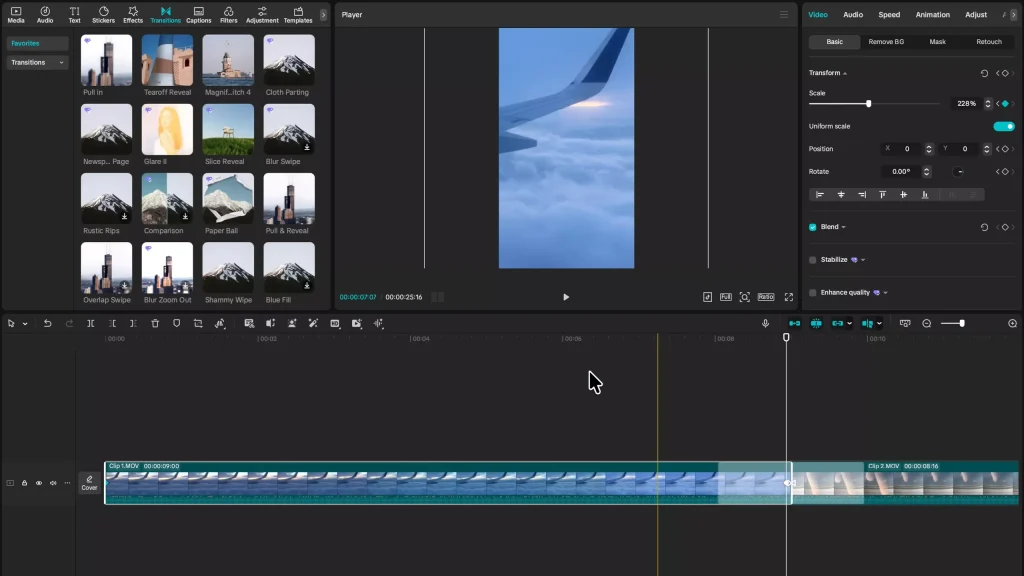
Clips cut directly from one to the next by default. To soften a cut, open Transitions, hover over an effect to preview it, then drag your choice between two clips. Change its duration by dragging its edge or adjusting the duration in the inspector panel.
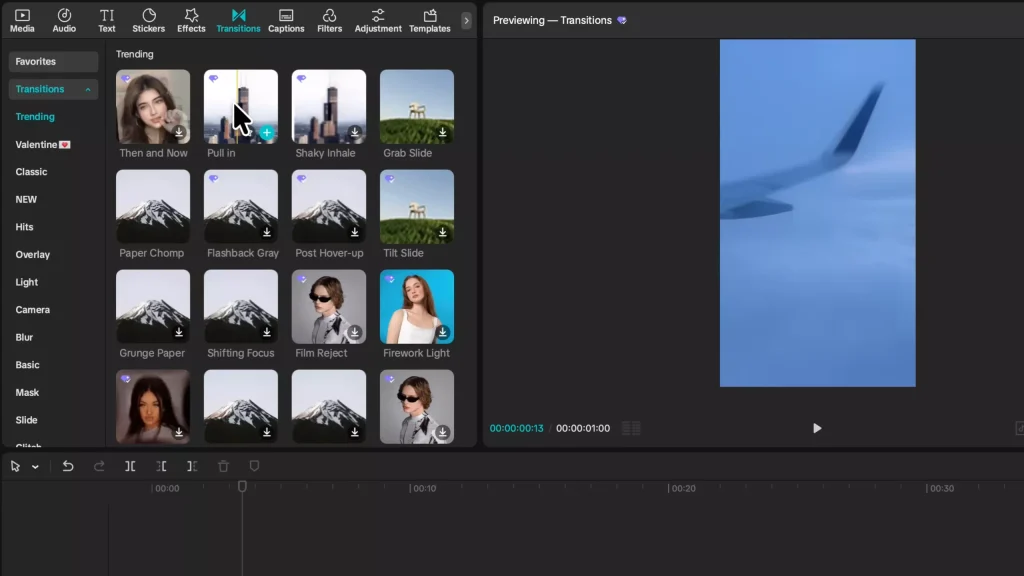
If you use a transition often, click its star icon to save it to Favorites. Keep effects purposeful: a transition should suit the edit, not distract from it.
Recognize the other timeline tools
The timeline toolbar includes undo, redo, split, delete, and marker tools. Markers can help you note moments that need attention. The crop option also gives access to tools such as freeze frame, reverse, mirror, and rotate.
You don’t need to learn every tool at once. Knowing where to find them is a good start.
Add Motion and Improve the Look of Your Footage
Reframe clips and create keyframed zooms
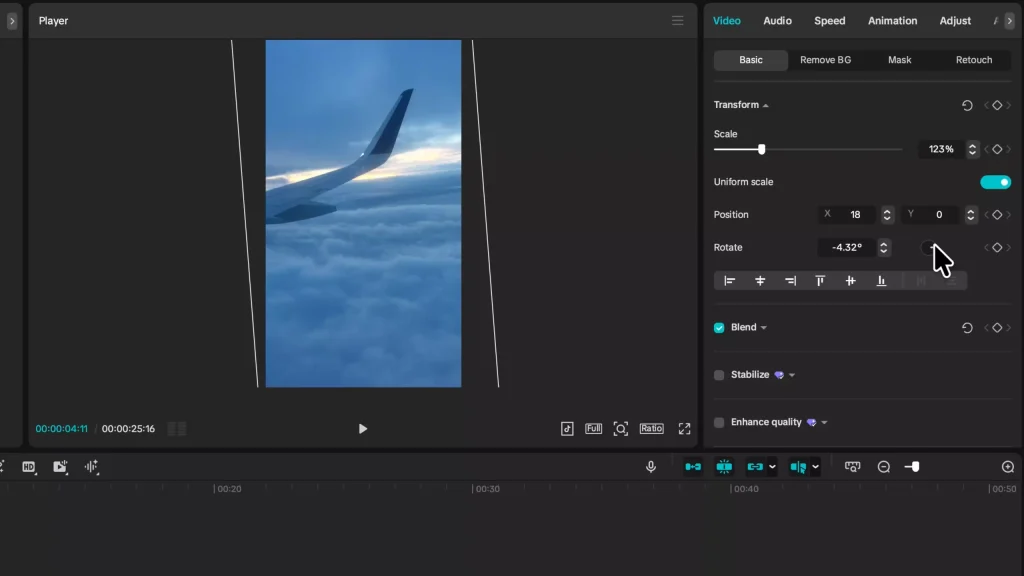
Select a clip and open Transform to adjust its scale, position, or rotation. You can also drag the footage in the preview window; alignment guides help you center it. Double-click a value’s name to reset it.
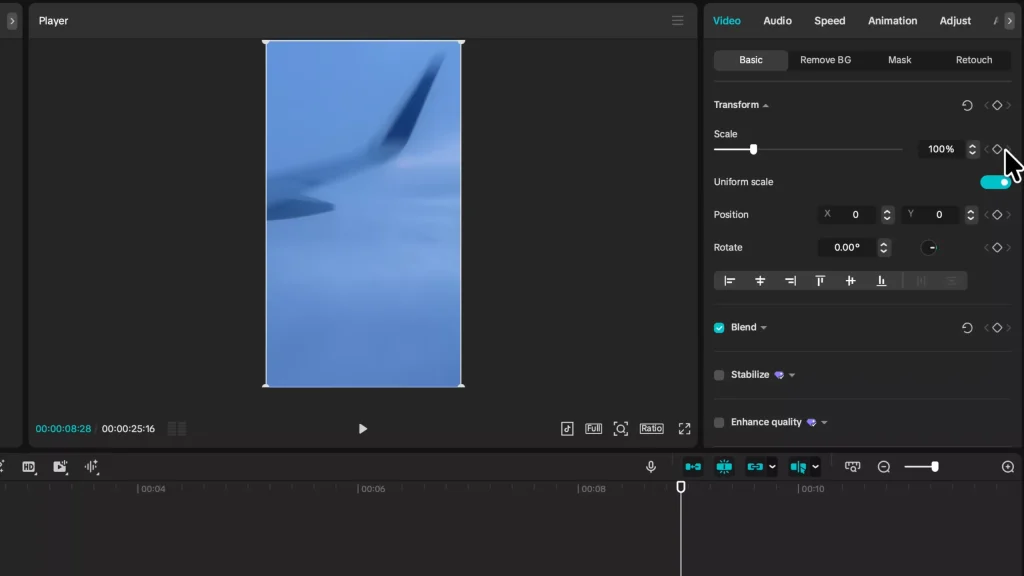
To animate a zoom, add a keyframe at the start of the clip. Move the playhead later, then change the scale or position. CapCut animates the change between those points. A gentle zoom can add movement to a talking video or a still shot.
Adjust speed and clip animations
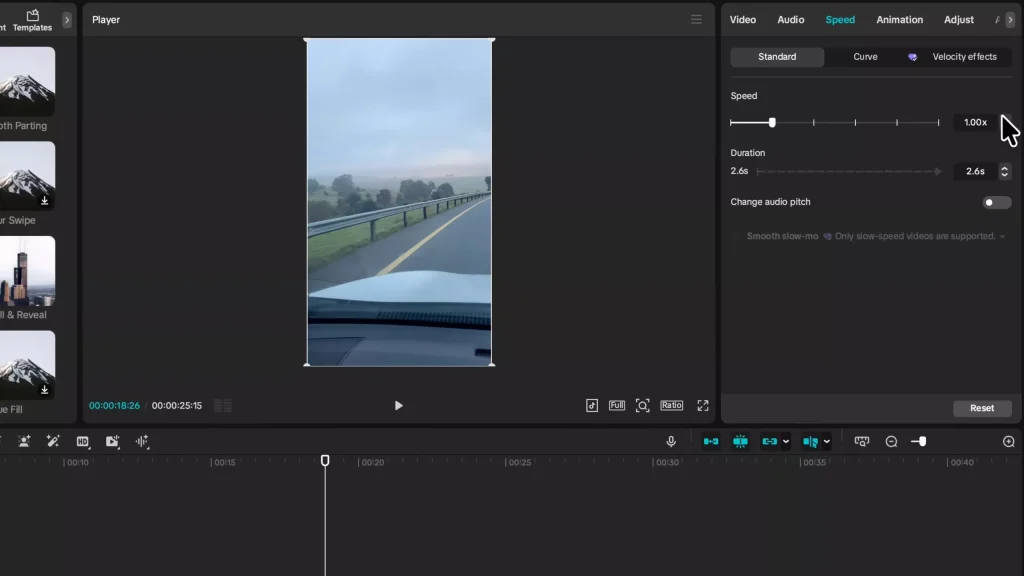
Use the Speed controls to make a clip faster or slower, or set a specific duration. For slow motion, turn on Smooth Slow Motion and select Optical Flow to help reduce choppy playback.
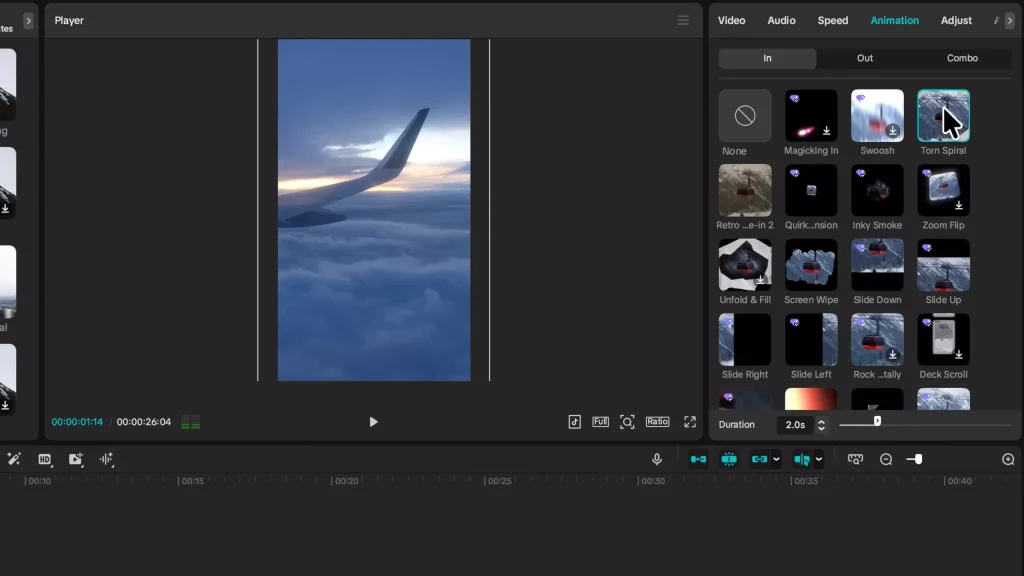
The Animation tab has In, Out, and Combo options for how a clip enters, exits, or uses both effects. You can adjust each animation’s duration. Subtle effects tend to look more polished than animations on every clip.
Correct color and use filters with care
In the Adjust panel, change exposure to make footage brighter or darker, saturation to control color strength, and temperature to shift the image warmer or cooler. Make small changes and check the result in the preview.
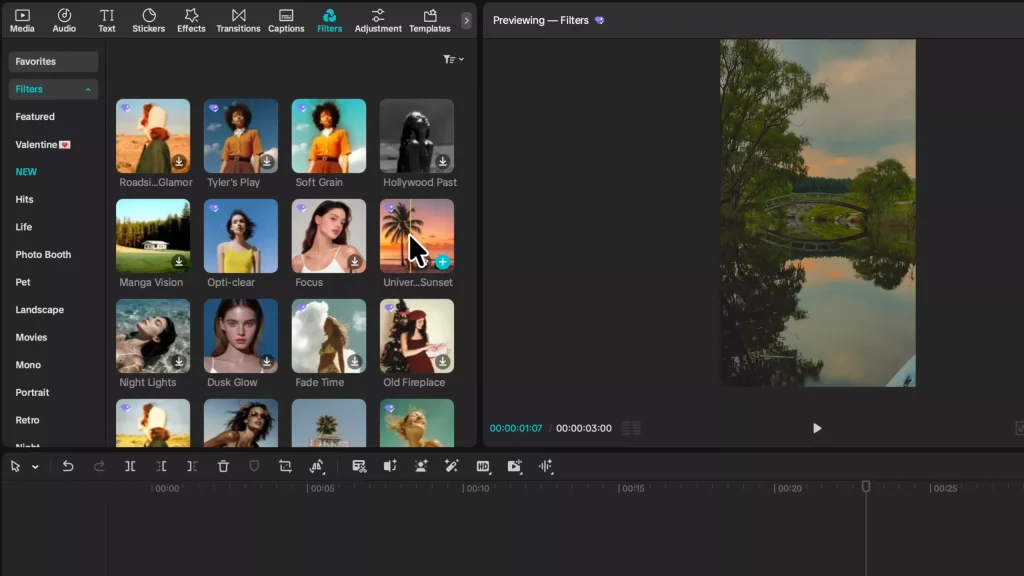
You can drag a filter onto one clip or place it on its own layer above several clips. A filter layer affects the footage beneath it. Keep filters light, and focus on clear footage before adding a strong style.
Build a Clear Edit With Audio, Captions, and Text
Add music and keep dialogue clear
Browse CapCut’s audio library, preview a track, and drag it beneath your video clips. The Beats tool can add markers to the music, which helps you line up cuts with the rhythm. Use clip audio controls to set volume and add fades.
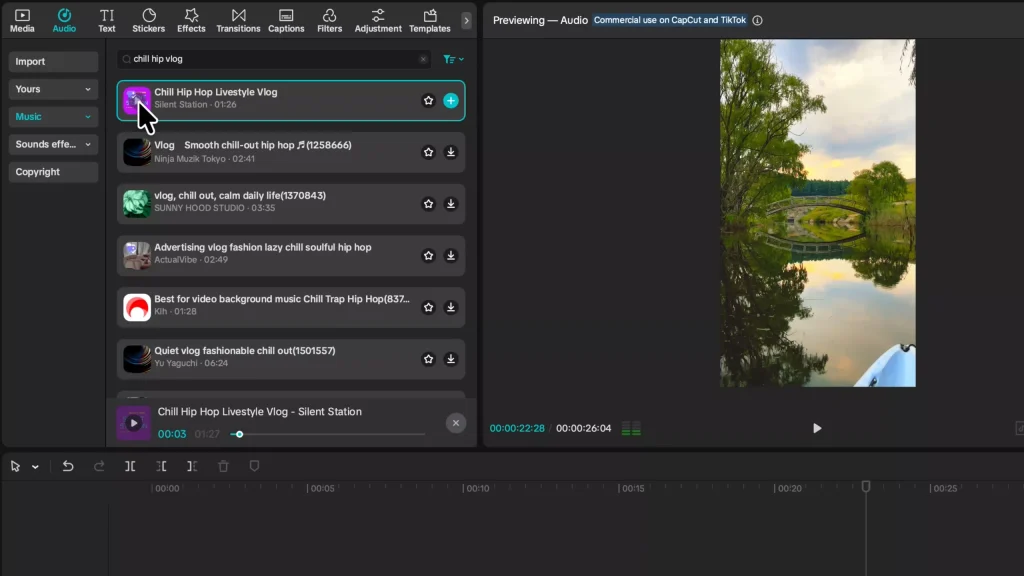
If dialogue needs help, try the voice tools in the audio panel, such as Enhance Voice, Reduce Voice, or Isolate Voice. Keep music below speech so viewers can hear every word. To lower music only during a voice section, add four volume keyframes: one before the speech, one at its start, one at its end, and one after. Lower the volume between the middle pair.
Record a voiceover and generate captions
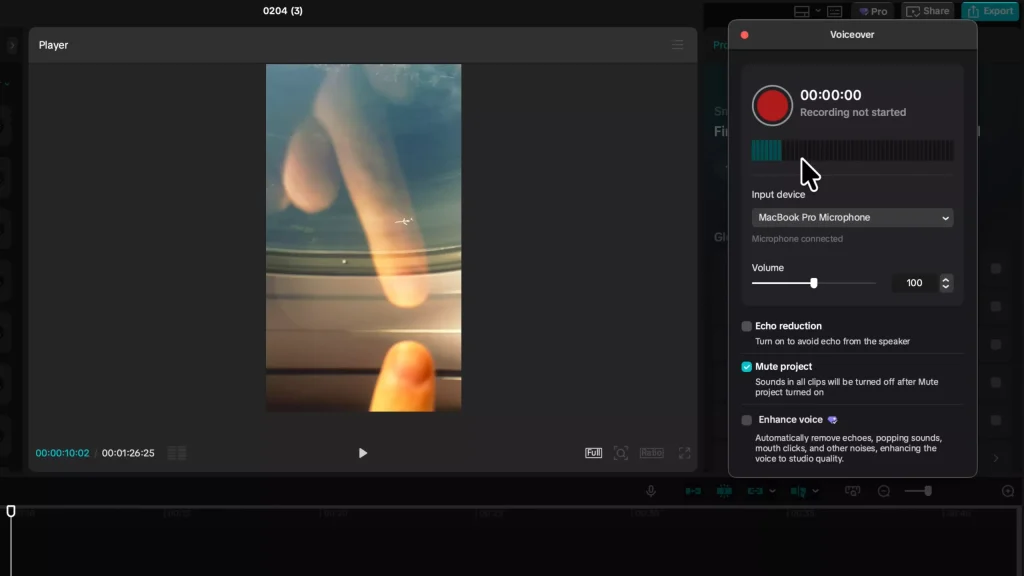
Click the microphone icon to record a voiceover in CapCut. If your timeline has other audio, mute the project while recording for a cleaner take. When you finish, the voiceover appears on the timeline.
Open Captions, choose the spoken language, and select Generate. Captions need speech in a clip or a voiceover. You can apply a caption animation template after CapCut creates them.
Add titles and callouts with text
Open Text and add default text to the timeline. Select the text layer to change its wording and appearance in the inspector. You can also browse templates by category; the Travel section, for example, could suit a title such as “Tokyo Japan.”
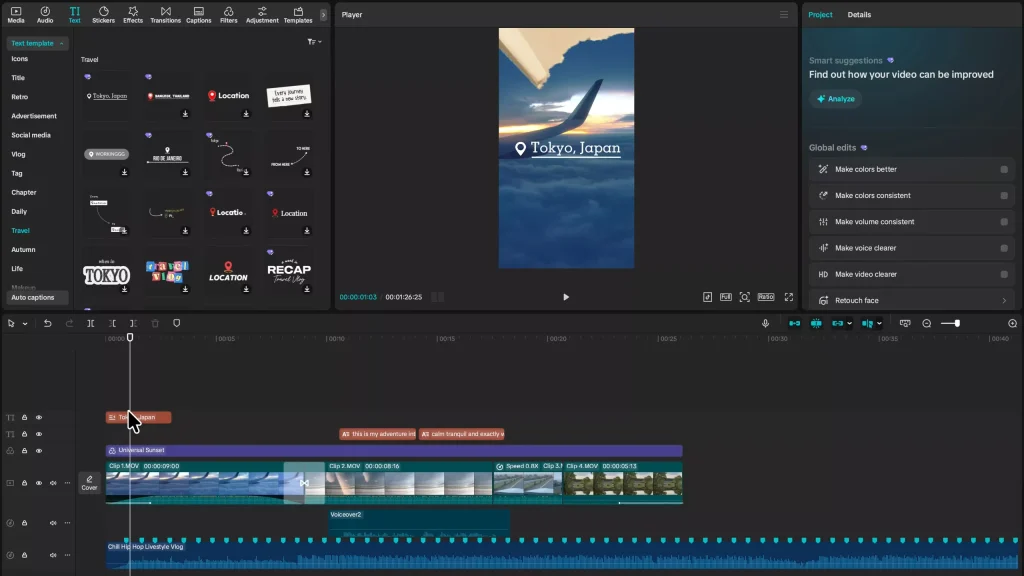
Text works well for titles, short callouts, or emphasis on a key moment. Keep it easy to read and on screen long enough for viewers to catch it.
Export Your CapCut Video and Keep Editing Smoothly
Choose export settings for your footage
Click Export in the top-right corner, rename the project, and choose where to save the video. Select 1080p or 4K based on your source footage; the tutorial recommends 1080p for most creators. It also suggests the recommended bit rate, H.264 codec, MP4 format, and 30 frames per second for a typical export.
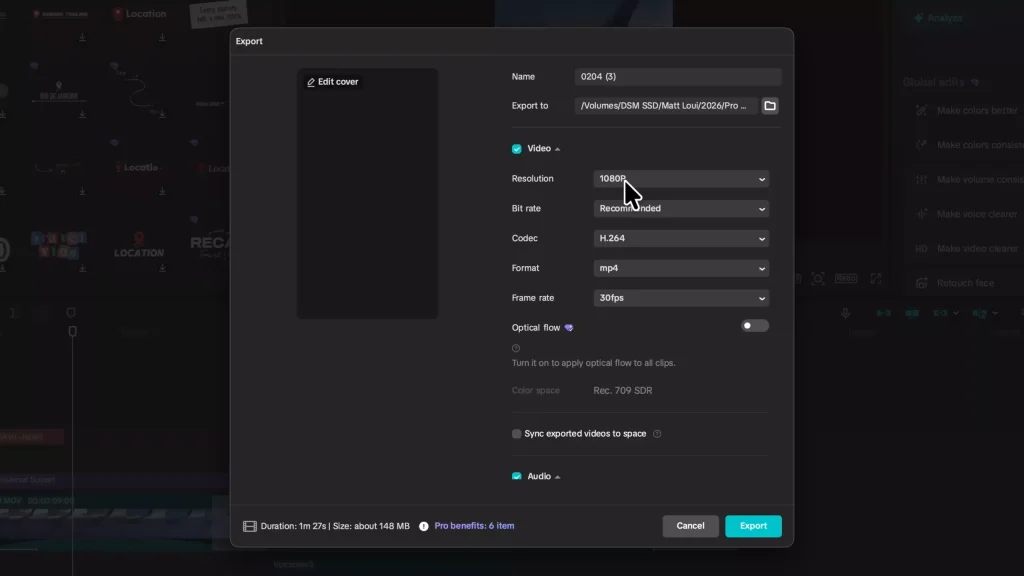
Check your settings before exporting the full timeline. The export may take time, so confirm the destination and file name first.
Improve playback with proxies and preview settings
If editing feels choppy, open CapCut’s settings, go to Performance, and turn on proxies. These use easier-to-edit files during playback. The tutorial notes that CapCut uses the original footage for export, so proxies don’t lower the final video quality.
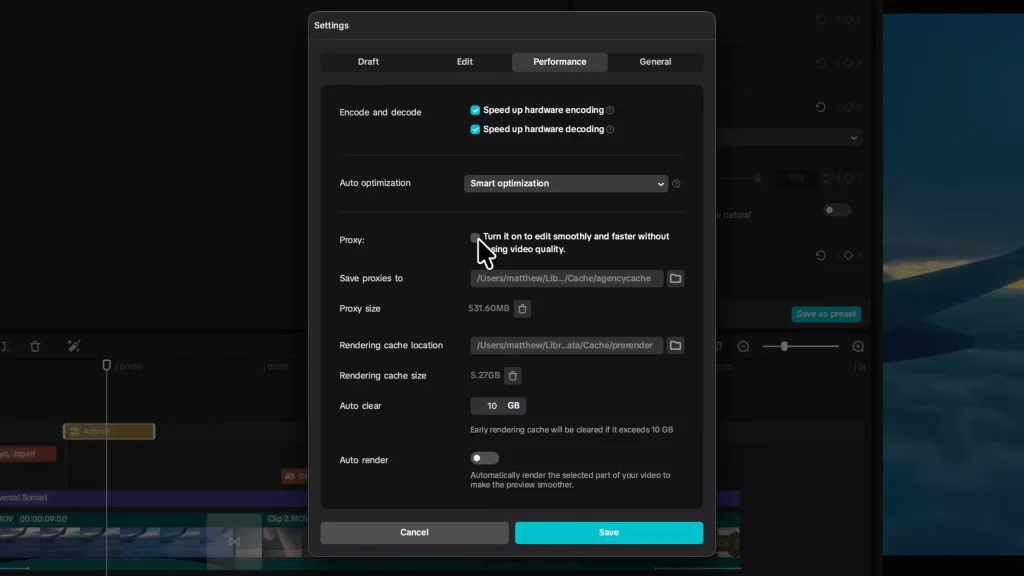
You can also lower the preview quality from the control at the bottom of the player. This can make playback smoother, while the final export still uses the original files.
Use finishing tools to save time
For vertical footage, switch the player display to vertical for a larger preview. To apply the same color changes across several clips, add a custom adjustment layer above them. Proxies and lower preview quality can help with slow playback, while volume keyframes keep music under dialogue.
For talking-head footage, try CapCut’s Transcript tool. It can help find silences, weak takes, and repeated sections so you can remove them more quickly.
Build a Repeatable CapCut Editing Workflow
A solid first edit follows a simple order: import and arrange footage, trim the timeline, refine the image, balance sound, add captions or text, then export with suitable settings. Start with clean cuts and clear speech before adding zooms, filters, or transitions.
Editing gets easier with practice, not extra complexity. Make another short video with the same workflow, then add new tools as you need them.
You can watch a video tutorial of the basics from here:

Frequently Asked Questions about CapCut editing
Is CapCut easy to use for beginners?
Yes. CapCut is designed to make common editing tasks accessible, including trimming clips, adding text, applying transitions, adjusting audio, and generating captions. Beginners can start with these basic tools and explore more advanced features as they become comfortable with the timeline.
Can you edit videos in CapCut for free?
CapCut offers free editing tools, but some features, effects, templates, and other assets may require a paid plan or purchase. Availability can vary by device, region, and version, so check the options displayed in your app before starting a project.
How do you remove unwanted parts of a video in CapCut?
Move the playhead to the beginning of the unwanted section and split the clip. Repeat at the end of the section, select the separated portion, and delete it. Preview the edit to make sure the remaining clips join smoothly.
How do you add automatic captions in CapCut?
Open your project and look for Captions or the automatic caption feature. Select the spoken language and generate captions if the feature is available. Review the results and correct spelling, timing, and punctuation before exporting.
What are the best export settings for CapCut?
For many standard online videos, 1080p resolution, MP4 format, H.264 encoding, and 30 frames per second are reasonable starting points. Use 4K when your source footage and delivery requirements justify it, and match the frame rate to your original footage when possible. The ideal settings depend on the platform, source material, and desired file size.
How do you make a vertical video in CapCut?
Open the project’s aspect ratio or canvas settings and select 9:16. Adjust the scale and position of each clip to fit the vertical frame, then check captions and important visual elements to ensure they aren’t cropped or covered by platform interface elements.
Why is CapCut lagging while editing?
Playback can lag when footage is high-resolution or the project contains many effects and layers. Try lowering preview quality, enabling proxies if supported, closing unnecessary applications, and freeing up storage space. Test a short export to see whether the issue affects the final video.
Can you save a CapCut project and continue editing later?
Can you save a CapCut project and continue editing later?
Yes, CapCut supports saving projects so you can return to them later. However, project-saving behavior and media management can vary by platform. Keep your original footage accessible, avoid moving source files unnecessarily, and make backups of important projects.
How can you make CapCut videos look more professional?
Focus on clean cuts, consistent color, readable captions, balanced audio, and purposeful transitions. Remove unnecessary pauses, check the framing, and review the entire timeline before exporting. A simple, well-paced edit often looks better than one overloaded with effects.
What should you do before exporting a CapCut video?
Watch the complete edit and check for awkward cuts, caption mistakes, missing media, inconsistent volume, and unwanted blank frames. Confirm the output resolution, frame rate, format, file name, and destination before starting the export.


